Monday, November 21, 2011

True Blue

With two bedrooms painted upstairs, it was time to move on to our bedroom. I did this project while Tim was away for the weekend. I did not pull a fast one on him; we decided on a color in advance and purchased paint during a 4th of July sale ($5 off per gallon via an online rebate). And the color is...


Blue!


I think Tim was a little shocked when I agreed to blue. It has nothing to do with the masculinity of the color. In fact, I love grey which some would consider a masculine color. My disdain for blue only surfaces when it is paired with its dastardly lover, tan. No, I don't hate tan either. Get them together and I'm disgusted with this blue-tan matrimony. It's not even blue-tan combinations that gets me. It's tan walls with blue accents. In our apartments, most rooms were tan or blue furnishings, pillows, etc. Sometimes blue was cheating on tan with tan's close cousin, brown. I vow to break the vows of marriage between blue and tan citing irreconcilable differences (or at least no more tan walls with blue throw pillows).

Update: I don't hate blue and tan combinations; I am just trying to make sure that not EVERY room in our house has tan (aka builder beige) walls with blue throw pillows as it has been in previous apartments. In fact, our downstairs has tan walls, tan furniture, and blue throw pillows. It's a nice look, just not for EVERY room! My mom was giving me a hard time after reading this post, so here I am to clarify!


We like bright colors in the White house. No baby blue. We're not Tar Heels fans over here (bonus points from Tim for using a sports reference!). We wanted a real blue, true blue, blue blue. Are you sensing a pattern? We did the same thing in the green room.


We again chose Behr paint. I love the coverage of Behr. It really is a high quality paint. I've always managed to find it on sale or with rebates. If you're buying just paint (not paint and primer in one as we did here), it's a reasonable price. The color we chose is French Court.


Has anyone ever told you that I love new bedding? I'm obsessed. I lust over new bedding often. In fact, I purchased two new sets of bedding for our room before we even painted the walls. I think of it as incentive. It motivated me to get this room painted so that I could put the new bedding on. Yay! I desperately want new bedding for the guest bedroom, but that's another story...


I purchased this bedding on clearance from Marshalls while we were in Florida. I actually purchased another bedding set on clearance from Meijer, but this set was a gorgeous steal that I couldn't pass up! I opted for a thin quilt and microfiber blanket rather than a bulky comforter. If my friend from grad school, Elyse, is reading this she will surely die. I used to not wash my bedding every week (gasp!), but now that I have two messy dogs I do. They are always getting fur and dirty paw prints on the bed. Our first comforter could not withstand the abuse from weekly washings, but I can easily fit a quilt and microfiber blanket in separate loads. After 3 months of use, they are holding up fine.

This photo is a sure sign that we need to DIY a headboard. I'm still trying to decide/figure out exactly what I want to do. I'm struggling with what to do for curtains (what color, how long, how do I flank them on the window with our bed off-center?), closet doors (paint them white or get rid of them completely?), and furniture (refinish, buy new, or keep as is?). What do you think?


You might notice that the bed seems huge. It's really just a queen on risers. I purchased king size flat sheet, blanket, and quilt because I never seemed to have any covers with two dogs and Tim snatching them. At least now I manage to have a small parcel. I intend to have some underbed storage here, but for now Monkey has commandeered this as her lair. The king sized blankets fit nicely over the side of the bed (the quilt is actually pulled to one side so I could get a nice photo if it, it sits about 6 inches higher normally).


Here's little Sully-man enjoying the new bedding. This room isn't finished yet. I'll be sure to post a before and after photo when we get some resolution on other items (closet doors, curtains, furniture, headboard, carpet, etc.).


Monday, November 14, 2011

Guest Post: From Ugly Kitchen to Zen Garden

Mansi is back with more juicy details on her kitchen project... I can't wait!


Weekend 3:

I was so excited to finally wrap up the bulk of this project!  We of course started with taping up trim, parts of the cabinets, and outlets. I also did some last minute sanding with a block sander. I would actually recommend being as thorough as you can with this to ensure the paint goes on smoothly.


While painting, I noticed some spots that I could’ve sanded down better…too late now!


We chose to use Valspar primer instead of Kilz due to the unevenness of parts of the wall. It did seem to go on more evenly and was about 7 dollars more.  We did two coats of primer to again ensure that the walls would be smooth and ready to go for the colored paint.


I love the Shurline classic paint edger for cutting in. I don’t know how people just use an angled paint brush!


There’s my husband priming away behind the fridge…painting around appliances is annoying, but not nearly as daunting as I’d expected.


I had two standard rollers for priming and a new Purdy roller for the green paint. We again chose Valspar for the paint and chose the color Zen Garden.

Cutting in with my Shur Line paint edger!


So after six hours of breathing in paint fumes, we were left with a very bright green kitchen!  It ended up looking a bit brighter on the wall than I’d expected but overall, it definitely looks much more open and lighter than before. 


While we were still motivated, we changed out the hardware on the cabinets to a simple brushed nickel handle.  That was the quickest and easiest home improvement project ever! I wish I’d done this months ago!


Not sure why the color looks like a lime green here, but the small pops of silver definitely help make the kitchen look more modern.

We also needed something for the big open wall space above our kitchen cart. We contemplated putting up some artwork, but decided to go with something more functional – a pot rack!  We chose one from Crate and Barrel because we could return it if needed (it’s slightly cheaper at Amazon) and because it mounted to the wall as opposed to the pot racks that hang from the ceiling. While this was a pricey purchase, I absolutely love the look and sometimes the price tag can be worth it!  My one gripe with it is that you can’t really put anything on the top because the hooks make it an uneven surface.  We decided to showcase a picture drawn by my husband’s goddaughter –a green giraffe!


Maybe I’ll cook more often now that the pots are being openly displayed…


We’re also going to change the window treatments to add in some lighter colors, change the light fixtures, and paint some of the brown trim white…but we’re taking a little bit of a break now. It’s been a long month! Thanks to Chanelle for encouraging me to take on the project! We give ourselves an A for effort!


I can't agree more, Mansi. Look at that fabulous kitchen! Let's check out the before and after photos:


Before

After


I love how light and airy the kitchen feels with the fresh color and shiny hardware. You know I'm a sucker for a classy cabinet pull. This project proves that you can make a dramatic change without breaking the bank or doing serious demolition. Great job Mansi and Calvin! A for effort indeed.

Wednesday, November 9, 2011

Guest Post: Score, Spray, and Scrape!

I'm back with another fantastic guest post from my good friend Mansi. We attended Miami together and worked as Resident Assistants in MacCracken Hall (one of the most photographed residence halls). Mansi and I share many fond memories playing board games, dueling in mean beans on Sega Genesis, watching Grey's, and eating UDF. I was also fortunate enough to be the Matron of Honor and Mansi's wedding to Calvin (one of the sweetest guys you'll ever meet). Mansi and Calvin bought their house a year and a half ago and have been itching to change the dated look in their kitchen. Get ready for a transformation!


Hello readers of the Whites’ blog!  It’s pretty much an honor that Chanelle asked me to post on her DIY blog since my husband Calvin and I are nowhere near as crafty and skilled as Tim and Chanelle!  Here’s the four of us when we just recently visited the Whites (please ignore the crazy hair!)


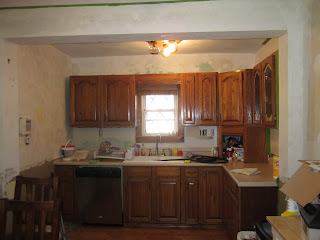
Calvin and I are also new homeowners and from the minute we closed on the house, I knew I had to get rid of the wallpaper in the kitchen!  There was simply too much brown in the kitchen (laminate wood floors, brown paint on the bottom, brown trim, brown cabinets, brown window treatments).  


Weekend 1:

Little did I know what I was getting myself into! I did a little internet reading about taking off wallpaper and talked to a few friends. The lady at Lowe’s told me what I needed – spray, scorers, scrapers, and patience (she wasn’t kidding!).  We started by scoring (putting small holes in the paper to let the spray sink through). Calvin and I debated on how much to score – I was worried about damaging the drywall. After a few times, I realized it’s necessary to score a lot to make sure the spray can do its job.  Any scrapes on the drywall could be patched up later.  Chanelle’s advice to me was that anything could be fixed! I kept that in mind as I botched up my kitchen walls!
Scorers


A scored wall


I used Piranha liquid spray remover.  We ended up using a borrowed wallpaper steamer for a few tough spots the following weekend. I didn’t consider buying a steamer since this is the only room in the house with wallpaper (priced at $55 at Lowe’s), but I did notice it was a lot faster. It may be worth the investment depending on how much wallpaper you are removing.  I was able to borrow scorers so we just had to purchase the spray, a couple scrapers, and big bucket of joint compound (about $40 total).  We'd also bought an electric sander months ago (I’d once dreamed of painting my cabinets white like Tim and Chanelle did). Luckily the sander came in handy for this project.


Back to the task at hand – After we scored the wall, I’d spray it, wait for 15 minutes, then start to scrape and peel it off.  I learned that it is really important to not spray a large area. If the spray dries, then you basically have to spray it again.  I had peeled off a little bit of the wallpaper a few weeks ago so I knew there was at least one layer underneath it.  Good news – there was only 2 layers of wallpaper! Bad news  - at some point, the previous owners did their own kitchen project and half of the time, they took off the first layer.  And the other half of the time, they left it there as a special present for us.  Sometimes bits of plaster fell off and sometimes the drywall allowed the wallpaper to peel off beautifully. Other times, we had to peel and scrape the wallpaper off bit by bit. That’s where that patience came in handy…

Pretty sure we scraped a little too much off here…


 I also learned that the best way to get rid of the small bits that refuse to come off was to get it as wet as possible. I’d spray it with the liquid remover or use a wet sponge, wait 30 seconds, and then use my putty knife to pry the bits off. 

I almost forgot to mention our hasty decision to remove the trim! I wasn’t planning on taking off the trim, but then I saw that there was wallpaper underneath it. We figured we’d take the trim off and just tack it back on…yeah right. Once Calvin got a hold of the hammer and started prying all the brown trim off, it was only moments before it started snapping in half.  I then made the decision to tell him to get rid of all of it except for the floor trim.

Calvin removing the trim


The trim sometimes ripped of chunks of the wall


It took us about 4 hours on a Saturday and about 6 hours on a Sunday to take off most of the wallpaper, border, and the trim. We also used a block sander and the electric sander to smooth down the walls.  I would suggest safety goggles and even a mask as this tends to put a lot of dust in the air. Also be sure to use drop clothes to make it easier to clean up your counters, cabinets, and floors.


I actually look like I know what I’m doing


Weekend 2

We removed what little wallpaper we had left to remove. I spent the rest of the day smoothing over the walls with joint compound.  I just used my cheap putty knife and used spackling technique. Boring, time consuming, but easy.  I learned just how important it is to try to get all the wallpaper bits off. If not, the joint compound’s moisture will then soften the glue bits and the paper will come off as I am putting on the joint compound (how dare they!).


I used about 2/3 of this bucket!


Some of my handiwork


I did all the patching while Calvin was busy with the steamer and started on taping to prepare for painting.


We lived in this kitchen for two weeks before getting around to painting….  Stay tuned for the conclusion of our project!


That's right folks; there is a part two of this project! Mansi will be back in a few days with another post. I can't wait to see the before and after photos!