 |
| Unfinished |
 |
| Finished! |
When it came to the tile backsplash, we decided to use the same trim tile. We defined the edges of the backsplash first so that we knew where to install the backsplash tile. We 'glued' our trim tile using the caulk-like product. We did have to make a couple of cuts here. We used the boundaries of the vanity as the edges for the backsplash too. That did leave a tiny gap between the wall and the backsplash on the right, but I actually think it looks better that way. You can see the full effect when you view the photos at the end of this post. At first we were a little skeptical, but it looked weird pushed all of the way up against the wall.
When Tim and I went to look at tile for the bathroom, I saw this beautiful glass mosaic tile. It was way too expensive to put in the tub surround. We could have opted for an accent tile in the tub surround, but I liked the neutral look of the tile we chose.

We had this gorgeous vanity, pour style faucets, and blank space behind the vanity. Yes, we could have painted it the wall color, but that felt boring. When I spotted this glass mosaic tile, I knew I wanted to use it in the bathroom, so the backsplash was the perfect location.
.JPG)
For our kitchen backsplash, we used pre-mixed grout like this:
to adhere the tile to the wall. Yes, this was cheating, but who doesn't love a short cut? The tile just needed to adhere to the wall.
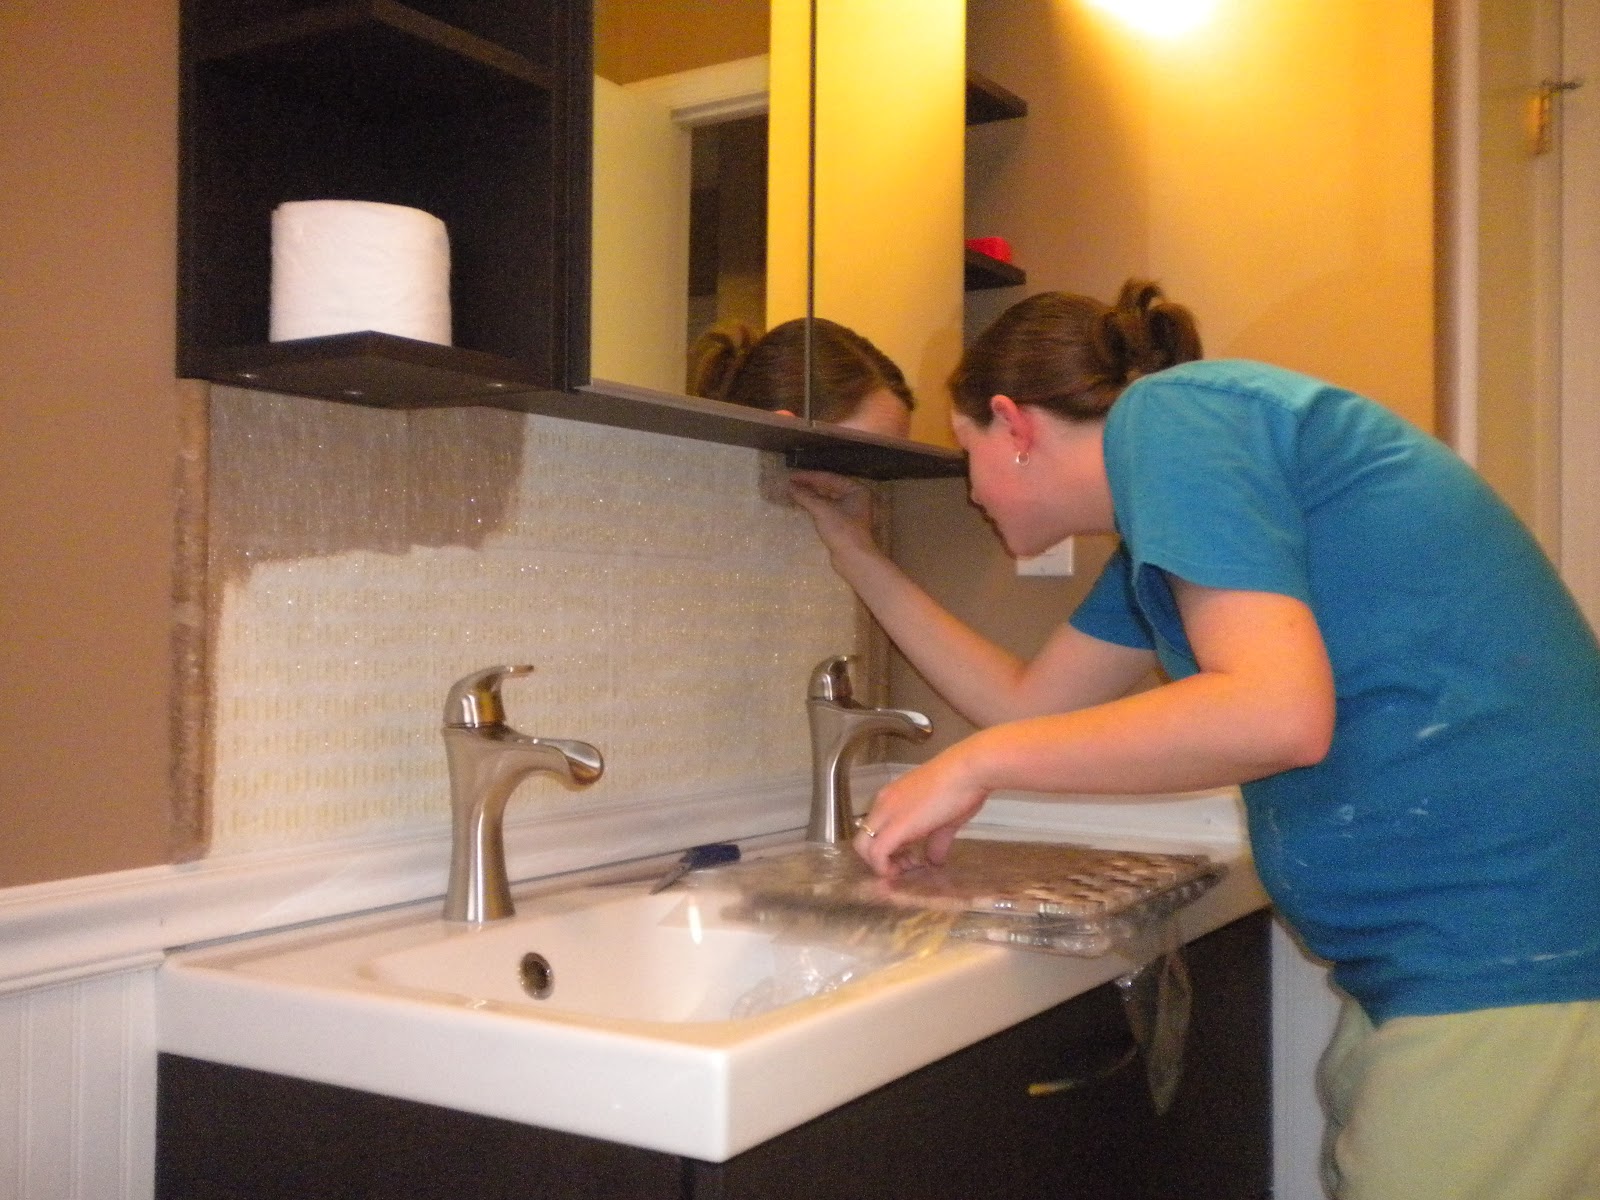
The shortcuts get even better... My mom told me about a new product called SimpleMat Tile Setting Mat. This product is so easy! I seriously think my youngest niece could have installed it. In fact, here I am 7 months pregnant installing tile backsplash before our Memorial Day visitors.
SimpleMat Tile Setting Mat is basically double sided tape used to adhere tile to your surface. My mom used the tile setting mat when she added granite tile to her kitchen countertop and it worked great, so I knew it was a good product. Plus, it's from the same manufacturer of our preferred pre-mixed grout. You can use it for countertops, backsplashes, and even shower walls. We used regular mix-it-yourself grout for the shower walls. It would have cost us close to $150 to purchase enough tile setting mat to do the whole shower area. Let's face it, we are frugal, so we went with regular grout for about $30 total.
For the backsplash, however, we didn't want to get out the bag of grout and mix again. Plus grout is messy and it would have been all over our sink, faucets, etc. I purchased one box for this project and it cost me about $20 (one box is 10 sq. ft. of coverage, so we even have leftover). It's very simple to use. You take a sheet of SimpleMat and cut it to size with regular scissors to match the area you want to tile. Then, you peel off the backing and stick it to the wall (you can see me doing this in the above photo). After you've covered your surface area with SimpleMat, you peel off the front backing (that doesn't sound right-- the paper that sticks to it so that it's not all sticky). So SimpleMat is now stuck to your wall and the front of it is sticky.
.JPG)
Our mosaic tile came on a mesh backing. It was a 12x12 mosaic sheet that you cut to fit. You just take regular scissors and cut the mesh backing to the size you want. Then, slap the tile on the wall! Or rather, carefully place the tile on the wall. You can see in the above photo that one sheet of tile didn't extend all of the way from the sink to the bottom of the medicine cabinet. I just cut pieces of tile off the mesh backing and added it.
Finally, you grout. Again, we used pre-mixed grout:
We didn't want to screw up the mixing of the grout which is part of the reason why we opt for pre-mixed. It can be difficult to get the same shade if you're using powdered dyes too. This is easy and it's already done for you (plus it only costs about $25 a tub and we used less than 1 tub for each project so far). We have used the same color of sanded grout from SimpleGrout in all of our projects (downstairs bathroom floor, upstairs bathroom floor and shower, kitchen backsplash, and now this backsplash). If we ever needed to touch up the grout for some reason, it's easy to know what we've used since it's the same product throughout.
.JPG)
You apply the grout with a float like this:


Isn't it gorgeous? Don't mind the stuff on the shelves. This bathroom hasn't been styled yet. :) I love a glass mosaic tile backsplash. It's in two rooms of my house now. After seeing this beauty, we seriously considered adding one in the downstairs bathroom. That decision is still pending. I think we couldn't decide what kind of tile to put in there, so we did nothing for now.
Sit tight. We're almost done with this bathroom renovation. I'll be back for before and after shots!
