Thursday, December 8, 2011

Canvas Art (Fail)

Recently, a group of friends and I have been getting together for Craft Club. This installment of Craft Club involved Amy, Caroline, Joy, Kathy, and Mika and a great canvas art project on Pinterest:

Image from here.
I thought this would make a great decor idea for our bathroom. It's puffy paint on a canvas, so moisture in the bathroom wouldn't be problematic. The walls in our upstairs bathroom are bland, but I was hesitant to put photos or anything that could be damaged in there. After I stumbled upon this project, I thought it would be perfect!

Step one: Find an image that you want to duplicate. I searched all over the internet for various fabric patterns. I liked this one because I could do 3 canvases- stripes on one, boxes on one, and the entire pattern on the center, larger canvas.

Image from here.

Step Two: Print out your image. You'll lay wax paper on top of the image then trace over it with puffy paint. Your puffy paint can be any color of your choice. Apparently, there are several kinds of puffy paint- glossy, matte, etc. I think I chose glossy. Also, my friend Caroline had a nice tip- if you get wavy lines or uneven pressure, just take the tip of the puffy paint bottle, press it into the paint on the canvas, and smooth out the puffy paint.


Step Three: Let the puffy paint dry. I waited a day before I tried with mine. My friend Kathy said it took a very long time for hers (she had larger pieces of puffy paint on her wax paper). Peel the puffy paint off of the wax paper.


Step Four: Spray your canvas with spray adhesive or brush it with mod podge. Press the puffy paint to the canvas in the desired pattern.


When you're done, you can spray the whole thing with a paint color. I planned to do one in white, brown, and turquoise, my bathroom colors. Ultimately, I scrapped this particular design, but I still love the project idea. I chose a very specific pattern with straight lines. Straight lines in puffy paint = not going to happen for these unsteady hands. I plan to repeat this project with a new pattern for the design. When I do this again, I'll choose something a bit more organic or curvy so that you won't notice slight imperfections as much.

Wednesday, December 7, 2011

Monogram Art

I'm obsessed with monograms. I could find a million uses for them in my house, but 937 monograms probably isn't a good look for one house. I found this idea on Pinterest:


Image from here.

I thought this would be adorable for the littlest member of the Meyer family, Chase. Our close friends Natalie and Alex, had Chase in October. I knew I wanted to make a gift for his nursery, but it took me a while to figure out exactly what I wanted to do. Until this little idea came to mind. I liked the look of the washers because it's kind of masculine and industrial, but still sweet for a little boy.

Sadly, I didn't take in progress photos during this process. I opened Microsoft Word and blew up a large C for the little man. I chose one that had a great structure with a bit of interest. I printed the outline on regular computer paper and cut it out. I grabbed a sheet of cardstock and gently taped the ends of the C to the cardstock.

I picked up a few packs of washers from Home Depot in varying sizes to the tune of $4. I later learned that you can buy a multi-pack from the Dollar Tree for $1, so if you attempt this project head there first! I gradually positioned the washers under the C by lifting the paper, placing the wahser, and laying it back down on top of the washers. After I positioned all of the washers, I glued each one with Alene's Tacky Glue. You don't need much. I used two drops of glue for each washer.

When it came to the frame, I chose a large frame from Pottery Barn. I wanted this to be a statement piece rather than a teensy piece of art. The Pottery Barn frame was perfect because it was large, had a great matte included, and had a small strip of wood between the image and the glass. I didn't think about this before I started the project, but it ended up being perfect. If you use very thick washers, you need a frame that has a little give between the glass and the back or one that has a spacer like mine did.

Here's the finished product:


Tim had the idea to put the baby washers inside the larger washers. Overall, I am quite happy with the look! I can't wait to do a monogram project in my house...

Tuesday, December 6, 2011

Guest Post: Semi-Homemade DIY

You probably remember our good friends Abby and Chris that I mentioned a few days ago in this post. They are cranking through the projects at their house. Up next is the bathroom, so let's check it out!

Hello fellow DIY-ers. My name is Abby and Tim and Chanelle are the brother-in-law and sister I never had. Today, my husband Chris, our friend Matt, and I are doing some semi-homemade DIY (ya know, like Sandra Lee’s cooking….partially done by her, partially done by someone else). We hired a contractor to install the shower surround, set the new toilet and vanity, and move the plumbing 6in (so that we can put in a smaller vanity to save some space). BUT not before we do the demo ourselves (oh, yeeeeaaaahhhh!!!). So, this blog goes out to all the people that do not have the skill and patience to completely “do-it-yourself”.

Chris and Matt ready for a bathroom demo!


A little history first: We bought our first house Dec. 15, 2010. It’s a 1.5story, 3bdrm, 2bthrm home, built in 1975. The previous owner was about to go into foreclosure, so while we didn’t buy a foreclosed home, we did buy one that had some like neglect. Thus, we need to re-do our mainfloor bathroom.

Before


I am fairly certain that the bathroom is completely original with the house…..just think about it….a toilet that is 36 years old. How many butts has it seen?!?! But seriously, the biggest problem is the shower surround. The tile has bubbled up and gotten a lot of black mystery substance (i.e., BAD). So, we’re taking out the tile and the dry wall behind it, as well as the toilet, and the vanity.


Before I go too much further, I should confess. Chris always teases me about my DIY-ness because to say that I “do-it-MYSELF” would be a bit of a stretch. Every time Chris starts a project he says ‘This week, on HGTV’s Make Your Husband Do It….”. So, in other words, I’m the idea-person and director (Ha!); Chris is the do-er. :-D

Shelby and Abby directing the demo


….Back to the demolition….Here is our step-by-step for demo-ing your bathroom for anyone who is cheap with limited DIY skills:

1.) Before, we (i.e., THEY) get started, we prepare the bathroom. Important step and one that I hate. In the bathtub (that we’re keeping) we put down old cardboard, an old blanket and then a tarp. This is an AMAZING idea (thanks Matt) because when they’re all done taking off the tile they can just fold it up. Perfect. We also took out ALL of the stuff in the bathroom (obviously, but thought it should be mentioned).

2.) We took out the bolts of the vanity. However, the last bolt was in a hard to reach place and the sink won’t come out. Chris and Matt did some internet research on it (thanks Google), but alas, no easy solution. So, we come to a fork in the road…..cut the pipe or leave it for the contractor to take care of it? :::images of water spewing out of the pipe and our new laminate floor buckling::: Hmmm…..leave it alone. The toilet came out no problem.


Google action shot


In progress shot


3.) They used the crowbars to start chipping off the bubbled up tile first. They came off pretty easy and fairly mess free (though behind the tiles is NASTY).


The tiles are coming off!

Look at all of those tiles gone!


4.) However, they ran into a slight problem. (Chanelle, don’t read this part). When they took off the next tile, HUNDREDS of large, black carpenter ants spewed out of the wall. ISN’T THAT SO NASTY?!?!?!? EEEEEEEEEEWWWWWWWWWWWWWWW!!!!! Chris made me take a picture of it but for the sake of Chanelle and I’s friendship, I am leaving it out. So, I called the contractor (SUPER nice guy, L-O-V-E him!!) and asked [a] is this normal? [b] what should we do? [c] will I wake up in a sea of ants?!?! He answered [a] this is not uncommon; it just means that we have a slight water leak somewhere (which we knew), [b] the ants should retreat back to their nest, but for those that don’t use wasp spray killer and set up some ant poison, and [c] no. So, we all learned something new this evening :-D


5.) Chris decided that we all needed to loosen up after the ant debacle….hence the amaretto and koolaid. But, hey, like Mary Poppins says “With every job that must be done, there’s an element of fun”…I’m just not sure she meant booze with crowbars.


6.) Many wasp killer sprays later, Chris and Matt are back at it. They eventually wise up and use the box cutters to cut a slit across the dry wall at the top and just take giant bricks of the tile/ drywall off. Much easier/faster.


7.) All done. They had fairly easy clean up because of the good prep we did (again, prep is my least favorite part but saves you SO much time, hassle, fighting, etc.).


Now, it’s the contractor’s turn. We may not be doing all the bathroom remodel ourself, but by doing the demo (as well as us picking out all the bathroom appliances over the course of a few months, waiting for good sales) we saved enough money to pay for almost all of the new stuff we bought to put IN the bathroom. And I’m happy with that. :)

Tools:
-Goggles
-Face masks
-2 crow bars
-1 blanket
-1 tarp
-old crappy cardboard
-cordless drill
-2 hammers
-2 screwdrivers
-2 plastic bins (for trash)
-2 box cutters
-wasp killer spray
-a strong stomach
-rippling muscles
-amaretto
-a comfortable couch with a dachshund


Ahhh! Abby the part about the carpenter ants is so scary. I'm glad you didn't unleash that on me in a photo attachment. Yikes! Let's hope we never encounter that madness in our DIY futures or I'll surely pass out, scream, jump up and down like a little girl-- all of the above.

I love the prep work strategy. I hope that really paid off when it came to clean up! Seldom do we think about that unsavory aspect of ripping out a bathroom, carpet, etc. That's also a fantastic tip to score/cut the drywall adjacent to the tile and take it off in large chunks.

We have a few bathrooms that need a facelift, so we'll be sure to keep your advice in mind when we embark on those projects! Thank you so much for sharing, Abby. I can't wait to see an after picture when the project is all said and done!

Monday, December 5, 2011

Blog Roll

Not only am I an avid DIYer and weak DIY blogger, I am also a DIY blog reader. I follow a whole slew of blogs faithfully. I don't have time to read them every day, but I check a few times a week to get caught up on the home improvement madness. I also love to cook-- er, eat and bake, so I follow several cooking and baking blogs as well. These gems are where I get most of my inspiration, so I thought I'd share with you in a little blog roll. Maybe we could say roll blog and that could be a new catch phrase like "Roll Tide." What does that mean anyway? Back to the point at hand... "Roll Blog."


Home Improvement:
7th House on the Left
Ashley and Greg are the owners of this wonderful space. They tackle some DIY projects themselves but also hire some out like with their current kitchen remodel. I appreciate a homeowner who knows when to call in reinforcements. I love weekly features like His&Hers Favorites plus Ashley has impeccable taste and graphic design.

Ana White
Ana is a stay at home mom and intense furniture builder. She provides 'Knock Off Wood' building plans for various projects, including those seen in expensive catalogs like West Elm. She's also building a Momplex (duplex for 2 moms) for her mom and mother-in-law. That's right, she's building a duplex home AND this isn't the first home she and her husband have built from the ground up. If she isn't a baller, I don't know who is.

Bower Power
Courtesy of Katie Bower. She's a stay at home mom, photographer, and DIY blogger. I follow her posts primarily for the hilarity. She's also an incredible photographer if you live in Georgia!

I Heart Organizing
Jen, a woman after my own heart. She is intense, an in awesome way. Every single drawer and cabinet of her kitchen is organized. She has incredible storage ideas that are not only functional but also gorgeous. The ideas are so inspiring. She comes up with incredible ways to store and organize everything from mundane items to seasonal decor.

Living with Lindsay
I think I'm in love with this woman for showing me my two favorite painting strategies here and here. Lindsay has fantastic advice when it comes to painting. She helps perfectionists like me function and overcome sloppy paint lines!

Love and Renovations
This Austin-based couple has a weekly feature called Friday Finds. I absolutely LOVE this because Amanda finds amazing pieces on Craigslist. Of course she doesn't always buy them, but she highlights a cheap treasure that can be turned into gold- or her favorite color, yellow.

Our Humble Abowed
Amanda and her husband Ben are avid DIYers. So much so that they are even building their own kitchen cabinets. Are you kidding me? Building your own cabinets!? That brings a whole new meaning to the phrase "do-it-yourself."

Young House Love
My favorite, my obsession, my love. John and Sherry tackle some intense projects like their current kitchen renovation. They started as novice DIYers like us but have evolved into a two-person full-time blogging team with a book deal and multiple side gigs. And best of all, they are frugal with impeccable style! John and Sherry always keep it real and share every last detail of a project, including pricing. This has been a helpful resource for us for everything from how much does this cost to how do we do that? It begs the question, how do they do it all?


Crafting:

Crafted Love
Allison Kaye is a Miami student and Ohio native. She blogs about all things crafty and it's awesome! My friend, Kathy, shared her blog with me. She's also planning a wedding, so expect some great DIY there. She also has some great blog design tips as well. I need to take a page out of her book and use some of those ideas!

How About Orange
Jessica Jones is a graphic designer. She makes gorgeous fabrics (my lunch tote is a fabulous example purchased from Etsy). She's full of small projects, desktop wallpapers, and printables.


Food:

Eat, Drink, & Be Married
Leah is someone I know in real life and might be all things Cincinnati. She maintains an incredible food blog of her own cooking as well as reviews of local restaurants.

The Girl Who Ate Everything
I love this blog because it's a great compilation of solid homestyle cooking. Of course, she has my favorite, dessert, thrown in there too! These are real crowd pleasers that any family will love.

Joy the Baker
Baking, my sweet, sweet love. Nom nom nom. The photos are just as gorgeous as the baked goods. I also love that Joy is keeping it real in the kitchen.

Pearls, Handcuffs, and Happy Hour
I've found some pretty fantastic recipes on this blog recently, including the Dorito casserole that we will be making for dinner tomorrow (that's right Allen, Bishop, Jicinsky, and Strickland families!) We'll see how it turns out. :)

Smitten Kitchen
Yummy yummy. There's certainly a mix of recipes here. Deb breathes new life into traditional recipes and flavors. You always see on the Food Network programs like Chopped that chefs are over-complicating things. Deb is definitely putting together wholesome recipes without fussy ingredients.


Miscellaneous:

The Bernout
You've seen L on the blog before. She's a friend IRL (in real life). I adore seeing photos of her daughter, Rivka, husband, the Professor, and dog, Marshall. L and I have a constant back and forth about various happenings in the blogosphere. Love her!

Coach Amy
Amy is someone I know in real life, so although I am a terrible runner, she gives great advice for those who are interested in the sport. I value her strategies to manage life, family, and work. I also enjoy her tips that apply to every day workouts.

Maybe if You Just Relax
I confess that I have not been reading this blog long. My friend, L, shared it on her blog, the Bernout and I had to take a peek. I almost died laughing, so I think I'm hooked.

Pinterest
Okay, this isn't a blog, but I absolutely love it. This website allows you to pin favorite websites, images, or ideas to a virtual bulletin board. You can write your own comments and maintain various boards (Sweet Treats, Bathroom Ideas, etc.). This is a great tool so you don't find yourself asking, "Now where did I find that ____ recipe that one time 6 weeks ago? Honey, you don't remember do you?" If you're interested, let me know and I'll send you an invite!

Queer Skies Ahead
This blog is maintained by a dog trainer with the pen name Bird. Bird married her same-sex partner Turtle a year ago and has been documenting their adventures ever since. This blog is some about their life and a lot about dogs. Of course I love it. Bird has extensive knowledge on dog behavior and training.

Random Musings
Yet another person I know in real life. Jing maintains this blog of weird stuff that entertains her. She's weird, so that entertains me. She's going to be travellin' the world like Carmen San Diego soon, so keep an eye out for that.


Whew, okay that's a lot. Again, I don't read them every day, but I do try to catch up with them a few times a week. I hope you enjoy some of my favorite web hangouts! Of course, add The Whites to your favorites or RSS feed too!

Sunday, December 4, 2011

When staining something is a good thing

Back in September (yes, it has taken me this long to post this project- for shame), we visited our good friends, the Trouts:

Tim, Chanelle, Abby, & Chris
We had a fabulous visit taking in an Iowa Cubs game, Des Moines Farmer's Market, and the Body Worlds Exhibit. All were fascinating events. Abby and I attended grad school together and Chris was later able to get a job at Tim's place of employment. We shared many a Trout-White date during the two years they lived in Oxford. We were also able to catch up with Abby's family including Abby's mom, dad, aunt, and cousins in addition to Chris' close friend, Matt. Monkey and Sullivan were sad to miss out on a great trip to see their buddy, Shelby:

She's a bit younger here, but this shows her spunky, take-no-crap attitude!


Chris and Abby have lived in their house almost a year now. Like us, they have been doing home improvement projects to update the look. The most recent adventure took us to the back yard:


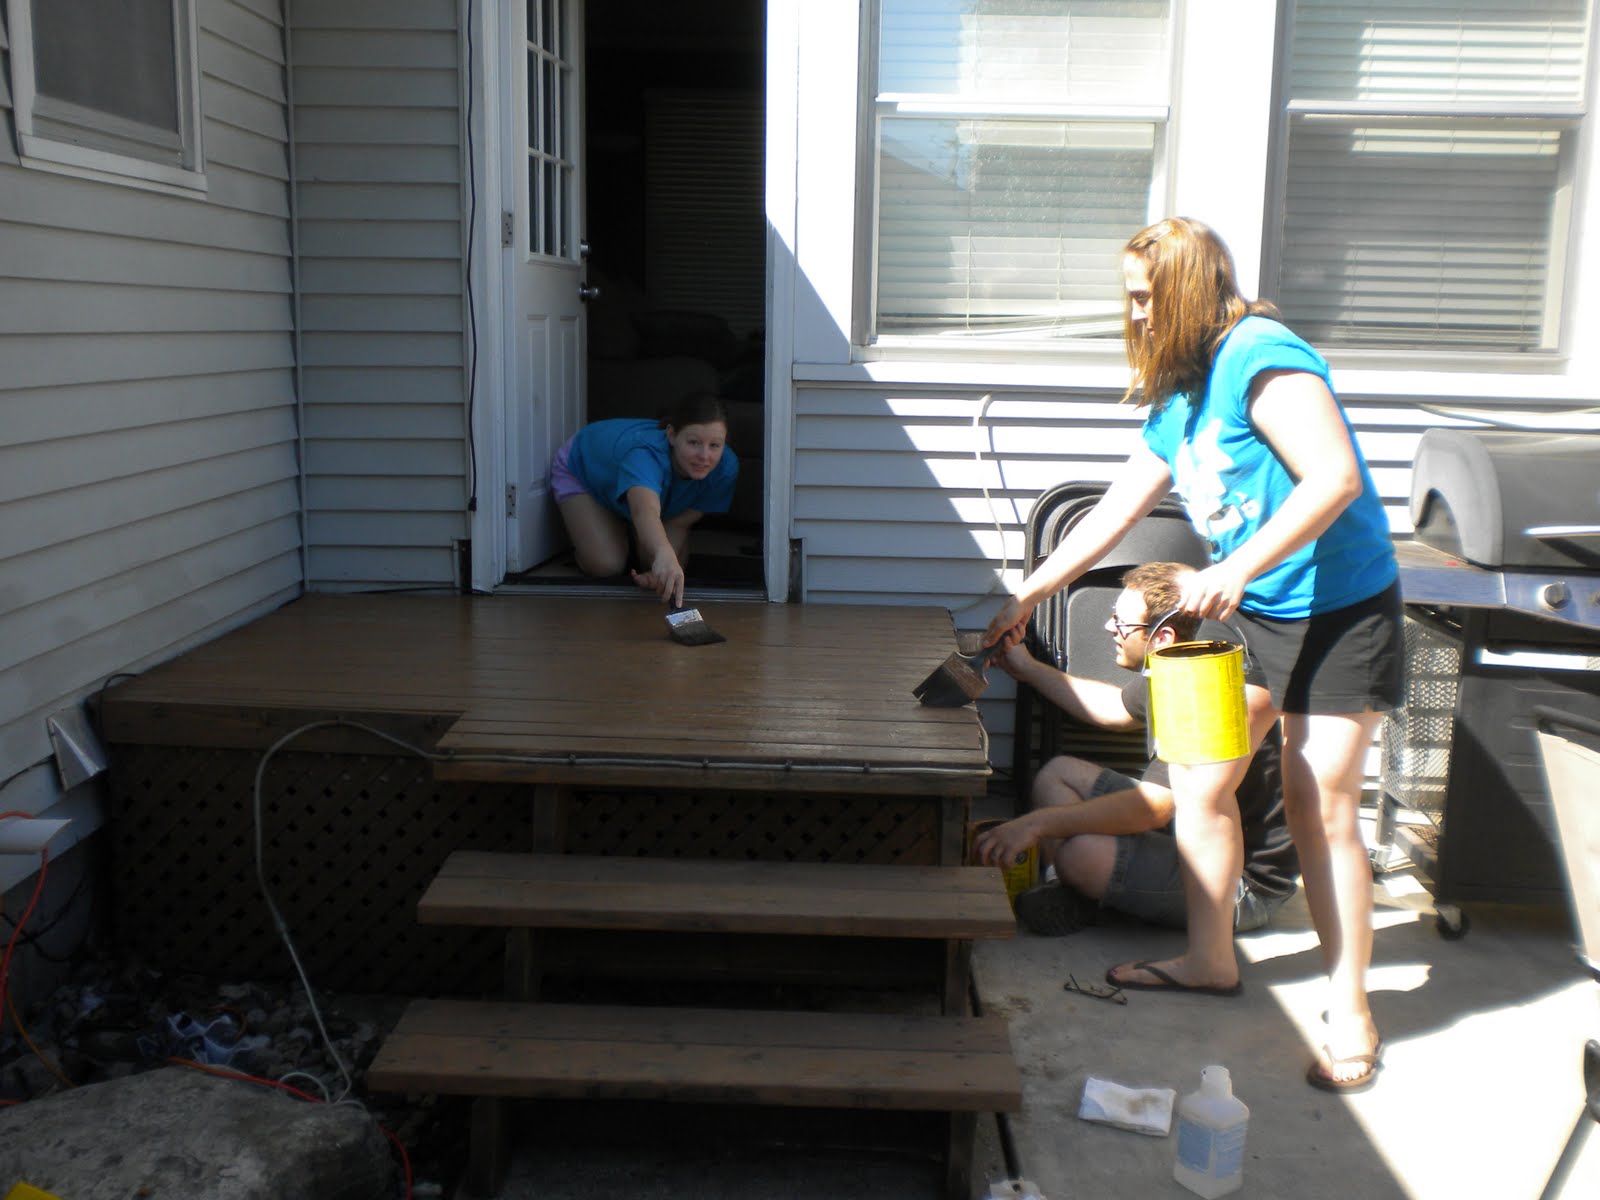
While in Iowa, Tim and I helped to stain their fence. Chris did a lot of the hard work already, cleaning the fence with a pressure washer. This was a big project on their to do list, so they were happy to have an extra set of hands.


You can see that the stain makes a HUGE difference! The right side of this photo looks brand new while the left gives it a worn look. This project took more stain than we anticipated because the wood soaked it up. Our basic tools included old clothes (this gets messy when things splatter), paint thinner (to clean up the splatter on the concrete), large paintbushes, and a few gallons of stain.


There was a large bush adjacent to the fence. Chris and Tim were initially puzzled by this obstacle until Tim had a great suggestion: place a tarp between the fence and bush, then gently pull it back to leave a small space to paint. It was still tight, but this maintained the healthy shrub and also allowed the fence to be painted.


The most difficult part was the landing and steps. You can see me in the above photo reaching across the surface for coat number two. Abby did all of the detail work painting the lattice at the bottom. Underneat the stairs was particularly tricky, so Chris got down and dirty to get that part (not pictured).  We also stained the small retaining wall around the concrete and mulch. Since it was late in the summer, they didn't plant anything here. Plans for next year include several hostas in the beds.


The Trouts also have a wood bench that sits atop the landing. The bench got the staining treatment also. Two coats on the entire project seemed to do it quite well. Abby, Chris, and Tim are hard at work while I take photos:


 Check out the before and after:

Before


After


Wow! What a huge difference an afternoon makes! This is a great project that anyone can do. It totally transforms the look of the yard with some time, paintbrushes, and stain. Thank you Trouts for a great Iowa visit!