He was paranoid to install the new toilet. Of course he worried that it would leak-- a very valid concern. He also thought it might break when someone sits on it-- a slightly irrational concern. I don't make fun though because I have a completely irrational fear of bugs of all kinds, especially spiders (I even woke him up in the middle of the night last night, during his very busy season at work, to combat a King Kong sized spider).
We purchased an all-in-one kit from Menards. We opted for this route for 2 reasonses: ease and price. We are extremely cheap after all. It included everything necessary for toilet installation and it was less than $100. We ultimately decided to purchase a different toilet seat because the one included was plastic; we wanted an enameled wood seat.

Tim had already done the hard work: removing the old toilet, scraping up the old wax seal, and cleaning things up. That portion was completed during demo. First, we placed a new wax ring. Then, we had to place the toilet on the floor. Sounds easy, right? Not so. The hardest part of the toilet installation was lining up the bolts in the floor with the holes in the toilet to actually secure the toilet. After multiple tries, we finally managed to get it lined up. Then, you just tighten the nuts on the bolts gently. You don't want to do this too tight, or your toilet might crack-- yikes!

After the base was installed, Tim placed the tank on the base. All he had to do was secure a few bolts. Then, he was able to hook up the plumbing in the back. Then, he held his breath as he turned the water on. You can see our helping girl, Monkey. She has to be involved in EVERY project in this house. She always ends up with paint on her butt, caulk on her paw, grout on her elbow, etc.
Sullivan decided to be a helping boy this time too. He usually paces around our projects nervously or curls up on the couch to wait for a snuggle buddy.

The toilet is done. Tim won't sit on it because he's too scared- what if it breaks, what if it leaks, etc. I sit on it several times and it seems fine... until I hear a big crack. Uh oh. No water leaks and we can't seem to find a visible crack in the toilet, so we think it must be the bolt making a noise. We loosen them and hand tighten them again. I sit down a few more times, another loud crack. Now I'm getting nervous too.
I get down on my hands and knees to inspect the toilet. There are no visible issues with the toilet. Then, I reach my hand behind the toilet and realize what's happened. There are two small cracks in the tile behind the toilet. Tim had to cut out 1/4 of the two tiles behind the toilet (they were shaped like an L) to fit around the drain. The tile couldn't handle the pressure on the two ends of the L, so it broke. You actually couldn't see that it was broken, I could just feel a small seam where I knew one shouldn't be. This was really not a big problem. We just filled in the tiny crack with grout, covered it in grout seal, and called it done.

Now, Tim is finally able to sit on the toilet without fear! I am happy to report that we've been using this toilet for two months without issue.

Whoa! Where did the vantiy come from? Because this bathroom is small, I didn't get any in progress shots of the vanity installation. We purchased a $40 vanity that included the cabinet, knobs, sink, and faucet. An all in one kit again, for a great price. Unfortunately, the faucet was chrome, so we ended up purchasing a brushed nickel faucet to match the rest of the bathroom fixtures. We found that for $26 from Home Depot, thanks to a heads up from our friend Brian.

Tim basically opened a box, took the vanity out, and plopped it in the bathroom. He secured it to the studs. Then, he had to hook up the plumbing, which was a bit more challenging. We purchased a drain, which we realized was the wrong size. Apparently, we were going from a sink drain to a drain pipe that was 1/2 inch larger. Tim thought they were the same size, but after he realized this we made a quick trip back to Menards and got the right size equipment for the job. This sink just uses a compression valve, so we didn't have to weld anything. Easy! Then Tim just hooked up the water lines to the facuet and we were good to go.

I mentioned our friend Brian a moment ago. He is also an avid DIYer. While we were at Brian and Kathy's house for a party, he invited us to see his stash of leftover DIY materials. Brian renovated both of their bathrooms in the last year also. He had a few remaining parts- new wax ring, old medicine cabinet, lights, etc. So Tim and I went shopping in the "Brian store" to see if we could use any of these items. Brian thought the medicine cabinet might look nice in our bathroom. He was definitely right!
Tim took the whole thing apart (removed the hinges, unscrewed the knob, and took the mirror out). He then spray painted it a crisp white to match the rest of the fixtures in our bathroom. At first, the finish wasn't excellent. He sanded and sprayed it again and it looked great. Tim picked up a new knob from Home Depot to match our vanity. The medicine cabinet did have hooks on the back to hang it on the wall. Unfortunately, these didn't match up with our studs, so Tim just screwed the interior of the medicine cabinet into the wall/studs. When I finally purchase rugs for this bathroom, I plan to get some decorative scrapbook paper to cover the inside of the medicine cabinet for a fun pop of color. Knowing this, he wasn't too worried about screwing into the cabinet.
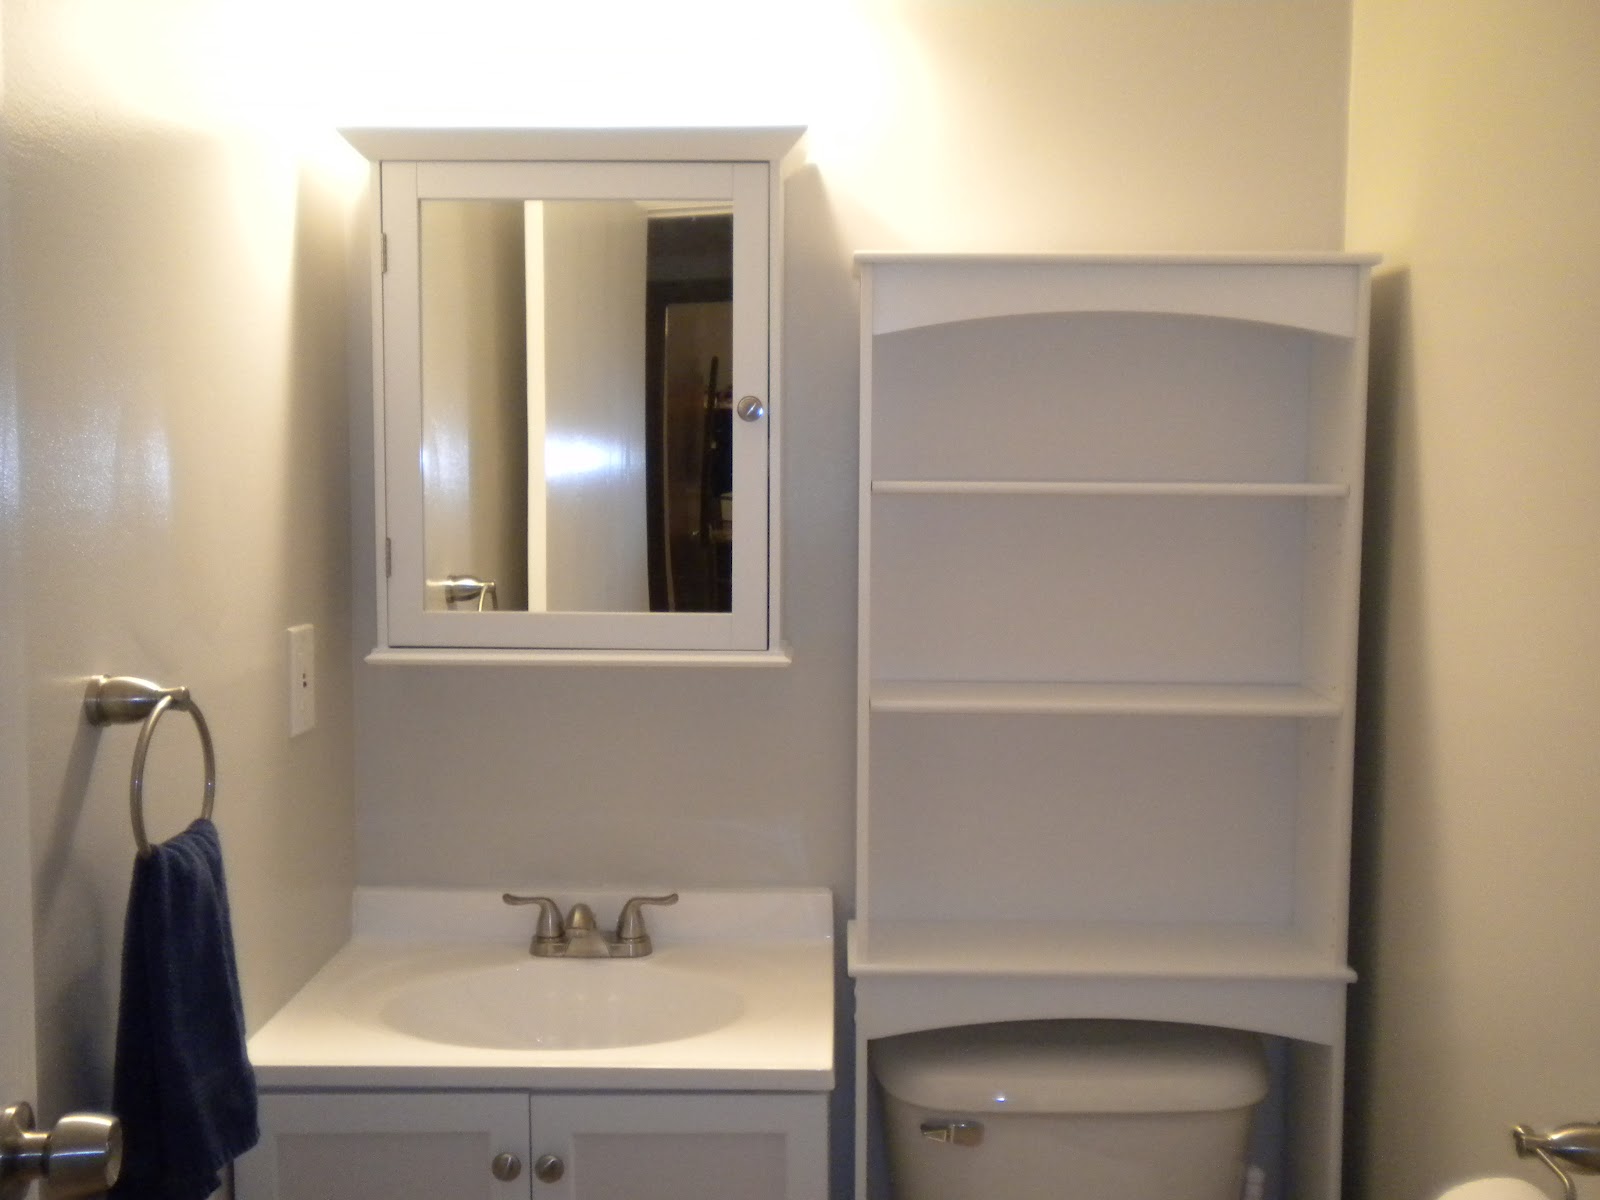
To maximize storage in this small space, we purchased an over-the-toilet cabinet from Wal-Mart. They had several varieties, but we opted for the open shelving cabinet. It was the cheapest option at just $40, which we of course loved. Tim smartly pointed out that this would be the best option for a guest bathroom anyway.
Since this bathroom is in our lower level, it isn't our primary bathroom that we use to get ready on a daily basis (well, we do right now because it's the only one that's functioning, but that won't be the case in a couple of months!). We want our guests to be able to spot towels, extra toilet paper, tissues, etc. with ease. We'll probably store extra bathing suits (since we have a pool, we keep several on hand for guests), cleaning supplies, dog shampoo, etc. in the vanity; we'd like those items to be hidden from view.
It's amazing how quickly these 4 major pieces were installed-- just one weekend! The tiles and paint took so long, so that I thought surely these bigger items would be time consuming as well. Tim and I were able to use this functioning space now! As I mentioned, I do still have some finishing to do in here. I'll be back soon to share photos of our outlets and fixtures.

No comments:
Post a Comment